Locations & Areas
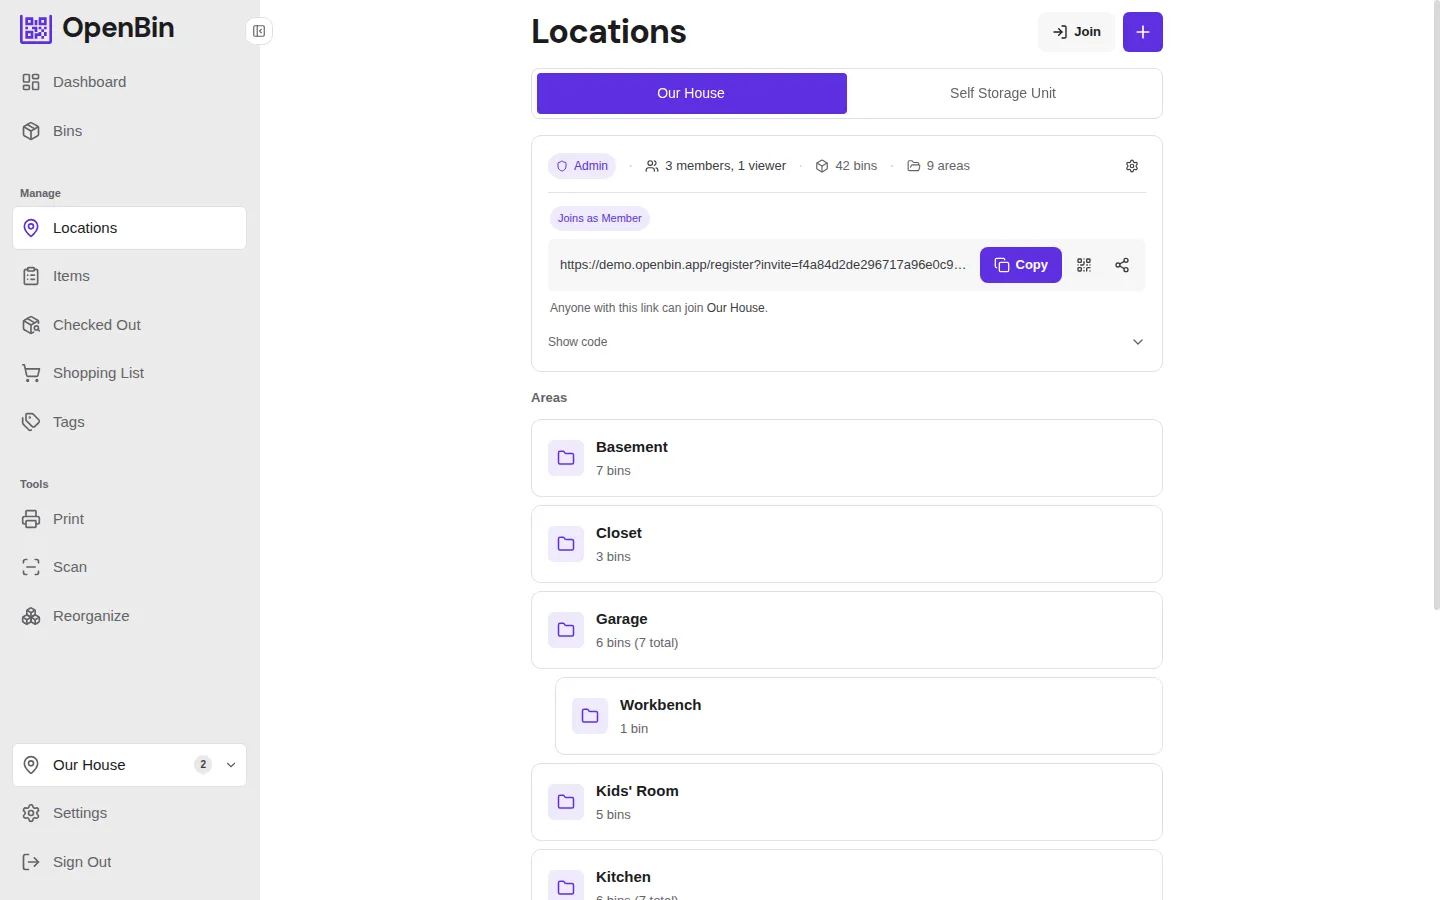
Everything — bins, areas, members, settings — lives inside a location. Areas are optional sub-zones for grouping bins.
Creating a Location
You become the admin of any location you create.
Joining a Location
Join a location by entering an invite code shared by an admin. You join with the location's default role (typically member).
TIP
Invite codes can be regenerated by an admin at any time, which invalidates the previous code.
Roles
| Role | Capabilities |
|---|---|
| Admin | Full control: manage members, change settings, create/rename/delete areas, move bins between locations, delete bins, change short codes, share bins, run AI reorganize. |
| Member | Create bins; edit metadata on bins they created; edit and add items on any bin in the location; cannot delete bins, manage members, or change location settings. |
| Viewer | Read-only access: browse bins, scan QR codes, and search. Cannot create, edit, delete, or pin bins. |
Admins can change any member's role from Location Settings → Members. The member list shows each person's display name alongside their email (when available) so admins can tell members apart.
Bin deletion is admin-only
Members can't delete bins, including ones they created. To delete a bin, an admin moves it to Trash from the bin detail page. Members who need a bin removed should ask an admin.
Default Join Role
Admins can set the default role for new members joining via invite code. Go to Location Settings → Default Join Role and choose Member or Viewer. This does not affect existing members.
Registration Modes
The REGISTRATION_MODE environment variable controls who can create an account (open, invite, or closed). See Configuration for details. When set to invite, new users enter an invite code during sign-up and are automatically added to the corresponding location.
Areas
Areas are sub-zones within a location. Examples: "Garage", "Attic", "Basement", "Shelf A". Each bin can belong to at most one area. Bins without an area appear under "Unassigned" in filters.
Hierarchy
Areas can be nested to form a tree. For example, "Garage" can contain "Workbench" and "Tool Cabinet" as sub-areas, and "Workbench" can contain "Top Drawer" under it. There is no depth limit.
The areas page shows this as a collapsible tree. Each parent area includes a count of bins in all of its sub-areas.
When you filter by a parent area, bins in all of its sub-areas are included in the results.
INFO
A parent is set at creation and cannot be changed afterward. To reparent an area, delete it and recreate it under the new parent.
Creating and Renaming Areas
Only admins can create, rename, or delete areas.
- Create: Location settings → Areas → Add Area. Select a parent to nest it under an existing area, or leave blank for top-level.
- Rename: Location settings → Areas → edit the area name.
- Delete: Deleting an area also deletes all of its sub-areas. Bins in the deleted area and its sub-areas become unassigned.
Areas are scoped to a single location. Moving a bin to another location clears its area assignment.
Customizable Terminology
Admins can rename the core terms to match their use case. For example, a warehouse might call bins "Boxes" and areas "Aisles".
Navigate to Location Settings → Terminology to override:
| Default term | Example override |
|---|---|
| App Name | "Garage Inventory", "Studio Bins" — replaces "OpenBin" in the page title and sidebar header |
| Bin | Box, Container, Crate |
| Area | Room, Shelf, Aisle |
| Location | Site, Warehouse, Facility |
The new terms appear throughout the UI for all members of that location.
Activity Log
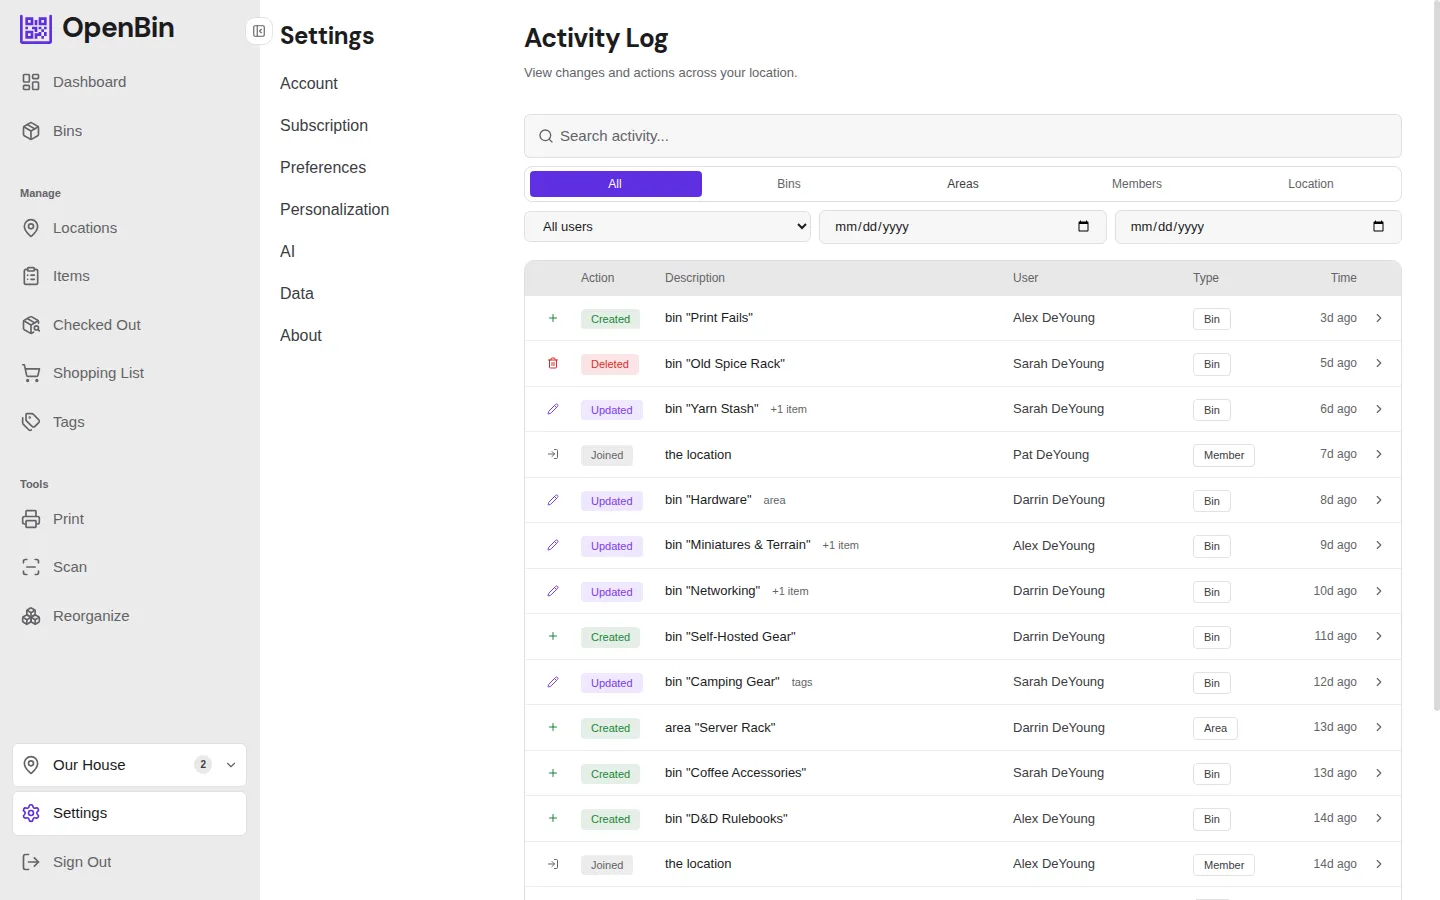
Every location keeps a per-location activity log. It records who did what and when — bin creations, edits, deletes, photo uploads, member joins, and more.
Access it from Location Settings → Activity Log.
INFO
Retention period for activity log entries is configurable by admins. Entries older than the configured number of days are automatically purged.
Trash and Retention
Deleted bins are not immediately removed — they move to a trash area where they can be restored. Admins configure how long trashed bins are kept before permanent deletion.
- Restore: Settings → Trash → find the bin → Restore.
- Permanent delete: Permanently removes the bin and all its photos. Cannot be undone.
- Retention period: Configured in Location Settings. Bins older than this limit in trash are purged automatically.
Defaults
| Setting | Default | Range |
|---|---|---|
| Trash retention | 30 days | 7–365 |
| Activity log retention | 90 days | 7–365 |